Choosing an Eveningwear Silhouette for Your Collection
LDX / CUSTOMER STORIES
What our customers say
4.775 / 5 · 100 reviews
Historical reviews supplied by LDX. Business-name mentions are updated to LDX; reviewer names, dates and ratings remain as supplied.
H
Hannah
★★★★★★★★★★5 / 5
10/10 review on my wedding dress and also a LDX customer support
I cannot say enough good things about my experience with LDX, and especially Alessandra in Customer Support! She was absolutely wonderful to work with and made the entire process so easy. I had ordered four dresses (two styles in two different sizes) and as soon as the first one arrived, I knew it was the one! Unfortunately, the other three were already on their way, and it was too late to cancel them. Alessandra was so incredibly helpful and made returning them completely stress-free. She even waived all three return fees, sent me the labels and instructions, and took care of everything for me. She was always SO fast to respond, and every email was genuinely kind...
Show more
I cannot say enough good things about my experience with LDX, and especially Alessandra in Customer Support! She was absolutely wonderful to work with and made the entire process so easy. I had ordered four dresses (two styles in two different sizes) and as soon as the first one arrived, I knew it was the one! Unfortunately, the other three were already on their way, and it was too late to cancel them. Alessandra was so incredibly helpful and made returning them completely stress-free. She even waived all three return fees, sent me the labels and instructions, and took care of everything for me. She was always SO fast to respond, and every email was genuinely kind...
S
Selene
★★★★★★★★★★5 / 5
I highly recommend LDX
My experience with LDXwas fantastic! I got the try on at home dresses and I just ended up getting the perfect one.
The quality is so great and the price is amazing, the shipping process was pretty easy and fast!
Show more
My experience with LDXwas fantastic! I got the try on at home dresses and I just ended up getting the perfect one.
The quality is so great and the price is amazing, the shipping process was pretty easy and fast!
I had such a fantastic experience with LDXand couldn’t be happier with both the dress and the customer service! The dress itself is absolutely beautiful. The quality is excellent, it feels very well made, and the color looks exactly like it did in the photos online. I was genuinely impressed when it arrived. What really made my experience exceptional, though, was the customer service. You initially connect through the AI support, but you can easily request to speak with a real person. I was then connected with an absolutely wonderful customer service representative who went above and beyond to help me with my situation. She was incredibly kind, understanding, accommodating, and genuinely committed to finding a...
Show more
I had such a fantastic experience with LDXand couldn’t be happier with both the dress and the customer service! The dress itself is absolutely beautiful. The quality is excellent, it feels very well made, and the color looks exactly like it did in the photos online. I was genuinely impressed when it arrived. What really made my experience exceptional, though, was the customer service. You initially connect through the AI support, but you can easily request to speak with a real person. I was then connected with an absolutely wonderful customer service representative who went above and beyond to help me with my situation. She was incredibly kind, understanding, accommodating, and genuinely committed to finding a...
Start an eveningwear brief with the occasion, movement and coverage you need. A photograph communicates mood, but a sample establishes fit.
By LDX Stores · Eveningwear
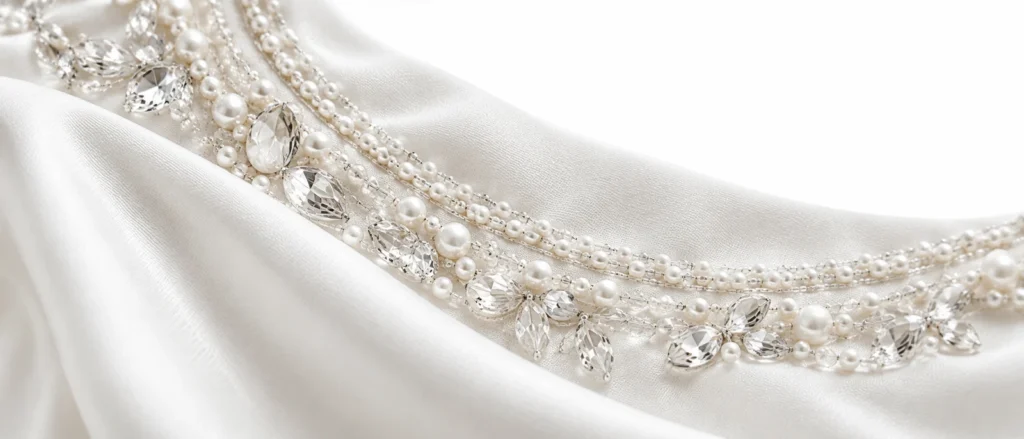
AI-generated fashion development concept illustrating this guide; not a photograph of a completed client order.
1. Start with the occasion, not just the outline
An eveningwear silhouette describes the overall shape of a garment, but that shape succeeds only when it belongs to the wearer's occasion. A narrow dress for a seated dinner, a full skirt for a formal entrance and a fluid gown for an evening that includes dancing solve different problems. Before choosing a neckline or adding decoration, describe the evening in ordinary language. Explain where the wearer will go, how long the garment will be worn and which activities matter most.
For a collection, this description becomes a customer scenario rather than a single event. Your customer might need an elegant dress that can travel, a statement piece for an awards ceremony, or separates that work for several celebrations. These are useful distinctions because they influence length, volume, internal support, fastening and the amount of styling the customer must supply. A sketch alone cannot communicate all of those expectations.
Write three priorities beside the scenario. Examples include an uninterrupted shoulder line, comfortable seated wear and a skirt that clears the floor while walking. Priorities help when a later choice improves one quality but compromises another. A dramatic train might be attractive in photographs while conflicting with a brief that requires independent movement in a crowded venue. The right answer depends on the original intention, not on which detail looks most impressive in isolation.
This guide explains how to turn those intentions into an eveningwear development brief for LDX Stores. It covers silhouette families, proportion, fabric trials, fittings and collection decisions. The illustrated images are design concepts, not promises about a particular fabric or completed order. Use the guide to prepare specific questions, then confirm the construction, material, price and schedule for your own garment through the project enquiry.
2. Define the customer without imposing a body ideal
A customer profile should explain preferences and practical needs rather than prescribe an ideal body. Avoid instructions such as making every wearer appear smaller or assuming that one shape suits an entire age group. Ask what the customer wants to emphasise, cover, reveal or move freely in. Some people enjoy a defined waist; others prefer a continuous column. Both can produce elegant eveningwear when the proportions and construction support the choice.
Separate personal preference from fit requirements. A client may prefer a relaxed waist but still need a stable neckline. A close bodice can be comfortable when properly developed, while a loose dress can feel insecure if it depends on constant adjustment. Record preferences in concrete terms: the desired sleeve coverage, acceptable neckline depth, preferred skirt fullness and tolerance for a garment that needs assistance when dressing.
For a brand, distinguish the first sample wearer from the intended size range. A successful sample on one person does not establish fit across every size. Explain the proposed customer range and ask how the team will develop and check the pattern beyond the initial sample. Do not use a single attractive photograph as evidence that proportions, support and movement will transfer unchanged to all customers.
Build the profile around a few realistic situations. Can the customer sit through dinner without loosening a fastening? Will they wear familiar undergarments or purchase a specific foundation? Are they comfortable carrying a train, or should the hem remain clear? These questions make the design more commercially useful while preserving individuality. They also prevent later disagreements in which the designer and wearer were imagining different experiences from the same reference image.
3. Read the silhouette as a sequence of proportions
Look at an eveningwear design from shoulder to hem and identify where its width changes. The shoulder, bust, waist, hip and hem form a sequence rather than separate styling decisions. A large shoulder detail can make a narrow skirt feel deliberate; the same skirt beneath a minimal bodice may read as quiet and elongated. Neither effect is automatic, so evaluate the relationship in a complete front and side view.
Mark the main visual break points on a sketch. These may be a waist seam, a draped hip, a change in material or the point where a fitted skirt releases into volume. Ask whether each break supports the intended emphasis. If the eye stops at several competing places, the garment can lose clarity even when every detail is attractive on its own. Removing one interruption may strengthen the entire design.
Use photographs taken at a consistent height and distance when comparing samples. A low camera position or a dramatic pose changes the apparent proportions and can hide an awkward transition. Keep a neutral comparison image alongside editorial photographs. The neutral view helps the development team judge the garment; the styled image helps explain the intended mood. Both are valuable when their purposes remain clear.
Check the back and side with the same attention as the front. Evening events often involve seated conversations, entrances and movement through a room, so the garment will be seen from many directions. A strong front silhouette with unresolved back volume can feel unfinished. Note where the side seam should sit, how the back neckline connects to the closure and whether the skirt volume is intended to concentrate at the front, sides or rear.
4. Develop a column silhouette with room for real movement
A column dress uses a relatively continuous vertical line, but it does not have to be rigid or uniformly close to the body. The outline may be gently shaped, softly draped or supported through the bodice. Start by identifying the area that needs the cleanest line. If the intention is a smooth hip, the pattern and underlayers need to be developed around that aim rather than simply narrowing the entire garment.
Walking and sitting deserve early attention in a narrow skirt. Discuss how movement will be provided through the cut, fabric behaviour, a slit, a vent or another construction choice. Do not assume that a hidden opening will solve every restriction. Its position affects appearance, coverage and the way the garment falls when the wearer changes direction. Test the actual proposed opening in a representative sample.
A column can be an effective foundation for a statement neckline, sleeve or surface treatment. Choose the dominant feature and keep the other decisions supportive. For example, a strong asymmetric shoulder may need a quieter waist treatment so that the diagonal remains readable. If the design also includes a contrasting belt, large appliqué and dramatic slit, review whether these details form a coherent composition or simply compete for attention.
During fitting, examine the dress in a relaxed stance rather than asking the wearer to hold an editorial pose. Check whether the skirt rotates, catches at the hip or pulls across the seat. Photograph the side view while standing and seated, with the wearer's consent. The purpose is to identify pattern or balance issues before they become accepted as part of the look. A clean line should come from development, not from the wearer constantly managing the garment.
5. Use A-line and flared shapes deliberately
An A-line or flared skirt can create space around the lower body while preserving a clear upper silhouette. The important design question is where the flare begins and how gradually it develops. A skirt that opens from a high waist has a different character from one that stays close through the hip before releasing. Describe the intended transition rather than using the word flared as the entire specification.
Consider the relationship between the bodice and the skirt. A fitted bodice with a restrained flare may feel composed and easy to style, while a soft bodice with substantial skirt volume may need a more carefully defined waist or shoulder. Test the whole garment, including its internal layers, because the outer fabric alone does not establish the final outline. A lightweight trial without the proposed support can give a misleading impression of volume.
Hem width should serve the occasion as well as the drawing. More fabric can create attractive movement, but it also affects handling, storage, pressing and the amount of space the garment occupies. Ask the wearer to turn, sit and walk around furniture during a fitting. Observe where the skirt falls naturally rather than arranging it before every photograph. A garment that looks appealing only after manual placement may not suit an evening of independent wear.
For a collection, vary flare with purpose. Several dresses can share a recognisable design language while offering different levels of volume. One might provide a modest release for dinner events, another a fuller shape for formal celebrations. Document those differences in the product brief so that development does not accidentally converge on the same skirt for every style. A collection becomes easier to understand when each shape has a distinct role.
6. Plan fitted-and-released silhouettes around the body
Fitted-and-released silhouettes place a close section above a more expansive lower skirt. The point of release can sit at different heights and may vary around the body. Rather than selecting a dramatic outline from a photograph, establish how much movement the wearer needs and how the fitted area will accommodate it. The transition must work when standing, sitting and stepping, not only when the feet are placed together.
Describe the release point using a marked sketch and a measurement method agreed with the maker. Terms such as mermaid or trumpet can be interpreted differently, especially across brands and reference sources. A simple drawing showing the close area, the start of expansion and the desired hem shape communicates more clearly. Add a side view if the back volume differs from the front.
Test the design with the intended footwear or an equivalent heel height. Footwear changes the practical relationship between the hem and the floor, and a fitted lower section can make stepping more demanding. Avoid approving a sample solely from a static mannequin image. The mannequin cannot demonstrate whether the wearer can enter a vehicle, climb a step or sit comfortably at a table.
If the first sample feels restrictive, discuss several possible revisions instead of assuming the whole style must be abandoned. The release may begin higher, the opening may change, the pattern balance may need adjustment or a different material may better serve the idea. Record which aspect of the original silhouette must remain recognisable. This gives the team room to solve the practical issue without replacing the design with an unrelated shape.
7. Give full skirts a practical structure
A full evening skirt is a system of outer fabric, shaping and internal layers. Its appearance cannot be specified only by choosing a circumference or adding more material. Decide whether the volume should feel rounded, angular, floating, folded or softly gathered. Each direction suggests different trials, and the most useful first sample is one that investigates the chosen behaviour rather than trying to look finished immediately.
Ask where the volume should sit when the wearer is still. Some designs concentrate fullness at the sides; others create a strong back profile or a continuous dome. Show these intentions in front and side sketches. If the reference photograph has the skirt spread by an assistant, say whether that arranged effect is actually required during wear. A styling arrangement should not be mistaken for the garment's natural resting shape.
Practical handling belongs in the design brief. Consider doorways, seating, transport and the possibility of needing help to dress. This does not mean reducing every full skirt to a convenient everyday garment. It means making the demands visible so the wearer can choose knowingly. An occasional ceremonial piece may justify more assistance than a dress intended for frequent evening use.
At fitting, check the waist connection and the distribution of weight as well as the hem. Ask the wearer how the garment feels after several minutes of normal movement. Review whether internal layers remain in position and whether the skirt returns to the intended shape after sitting. Document any special handling instructions that emerge during development. Those instructions should accompany the finished garment rather than remaining knowledge held only by the sample maker.
8. Treat drape as a controlled design decision
Draped eveningwear can look effortless while requiring very specific control. Begin by identifying the origin and direction of each fold. A drape may emerge from the shoulder, wrap around the waist or collect at the hip. If the brief only asks for soft folds everywhere, the sample maker has little guidance about which lines matter. Mark the dominant fold path and the area that should remain relatively smooth.
Distinguish a drape that is secured in position from one that is intended to move freely. Both can be beautiful, but they create different wearing experiences. A fixed arrangement may maintain a consistent photographable shape, while a looser section can change as the wearer walks. Ask how the proposed construction will behave after sitting, turning or carrying a bag. Review the answer in the sample rather than assuming that the initial arrangement will persist.
Fabric trials are especially valuable for draping. The same cut can produce very different folds in materials with different weight, surface and body. Work with a representative material before approving the final fold depth or amount of fullness. If the trial fabric is only an approximation, record what it does and does not demonstrate. This prevents a provisional drape from being treated as a fully resolved final construction.
Keep the drape's relationship to the body intentional. A fold crossing the waist or hip can shift the visual emphasis, but that effect should reflect the customer's preference rather than a generic rule about flattering shapes. Compare front, side and moving views. If the design requires frequent repositioning by hand, decide whether to secure it differently or accept that styling requirement explicitly. Ease of appearance and ease of wear are separate qualities.
9. Balance asymmetric necklines and one-shoulder designs
Asymmetry introduces direction into a silhouette. A one-shoulder neckline, diagonal drape or offset skirt detail encourages the eye to move across the body. Decide where that movement should end. If the shoulder line leads toward a hip detail, the two elements can reinforce each other. If every part points in a different direction, the composition may feel unresolved even when the individual details are well made.
The visual imbalance of an asymmetric design does not remove the need for a stable garment. Discuss how the bodice will stay in position and what undergarment or internal support assumptions are involved. Avoid treating a secure neckline as something the wearer must achieve by remaining still. Ask for a movement check that includes lifting the arms to a comfortable everyday level, turning and sitting.
Show both shoulders and the full back in the brief. A front reference often hides the most difficult transition: how an asymmetric neckline connects to the back, closure and armhole. A clear back sketch gives the team enough information to propose a coherent solution. If the back is intentionally open, explain the desired coverage and any foundation garment that must remain concealed.
For a collection, one strong asymmetric style can create a useful focal point without requiring every piece to repeat it. Consider whether the design belongs to the same family through fabric, colour or a shared fold language. At sample review, remove accessories temporarily so the actual garment balance can be assessed. Jewellery, a pose or dramatic lighting can strengthen an editorial image while disguising a neckline that still needs development.
AI-generated fashion development concept illustrating this guide; not a photograph of a completed client order.
10. Confirm material behaviour before finalising the shape
Material selection is part of silhouette development, not a final decorative choice. A sketch may suggest a smooth, fluid surface, but that appearance does not identify fibre composition or guarantee a particular hand feel. Describe the desired behaviour first: crisp folds, soft movement, a matte surface, a controlled sheen or a stable base for embellishment. Then ask the team to propose materials that can be evaluated against those requirements.
Review actual swatches where practical and record the selected material clearly. Photographs are helpful for colour direction and surface appearance but cannot communicate every relevant quality. Ask what the sample fabric will be and whether it matches the proposed production fabric. If a substitute is necessary, note the differences that could affect the result and which decisions must remain provisional until the correct material is tested.
Consider the garment as a combination of layers. Lining, support and decoration can alter the feel and appearance of the outer fabric. A material that drapes freely on a table may behave differently once joined to a structured bodice or covered with embellishment. Request a representative construction sample for the most important area instead of approving each component separately and assuming their combined behaviour will be satisfactory.
Keep a material approval record with the supplier reference or agreed identifier, colour, intended placement and any accepted variation. Do not rely on descriptions such as black satin when several options are under discussion. Clear identification helps avoid accidental substitutions and makes later repeat orders easier to discuss. Care requirements, availability and pricing should be confirmed for the chosen construction rather than inferred from the appearance of a website image.
11. Connect the neckline to the support plan
A neckline is both a visual frame and a working edge of the garment. Its shape affects how the bodice sits, which areas are exposed and what the wearer can comfortably do. When choosing a deep, wide, strapless or open-back neckline, discuss the support plan at the same time. A beautiful drawing does not explain how the garment will remain in the intended position throughout an evening.
Record the foundation assumptions in the brief. Will the wearer use their own preferred undergarment, a specific option selected for the dress or an agreed internal construction? Do not promise that every wearer can use the same solution. The appropriate approach depends on fit, personal preference and the design. If a particular foundation is required, it should be available for fittings so that the sample is assessed in the intended conditions.
Mark neckline depth and width on the wearer or a fitting sample with their agreement, rather than relying only on a reference model. Small changes can alter coverage and the relationship to the shoulders. Review the neckline while seated and moving, not just in a front-facing stance. Ask the wearer to describe security and comfort in their own words, then connect that feedback to specific areas for revision.
Keep surface decoration away from unresolved fit decisions. If the neckline still needs adjustment, expensive embellishment can make revisions harder and encourage premature approval. Establish the edge shape and support first, then confirm how trim or appliqué will interact with it. The final detail should reinforce a working neckline rather than conceal a problem that remains underneath.
12. Design sleeves around the intended activities
Evening sleeves can provide coverage, create volume or become the main feature of the garment. Describe which role matters most. A close sleeve, a floating cape and a sculptural shoulder extension place different demands on the pattern and on the wearer. If the brief combines several effects, identify the priority so that practical revisions preserve the most important part of the design.
Use realistic movement checks. The wearer may need to greet someone, hold a drink, reach a table or put on an outer layer. These actions are more informative than a dramatic overhead stretch that has no connection to the event. Observe whether the sleeve pulls the bodice upward, restricts the arm or changes the neckline. Record the movement and the visible result so that the maker can investigate the actual issue.
For detached, cape or draped sleeves, review how the loose sections behave around furniture and accessories. A beautiful length of fabric can become awkward if it repeatedly catches on a chair or interferes with a bag. This is not a reason to reject the idea automatically. It is a reason to decide on length, attachment and handling with the wearer involved.
Check the sleeve from the side and back, including its relationship to the shoulder seam and bodice. A strong front image can conceal excess folds or an unintended drop elsewhere. When reviewing a revision, compare the same positions as before. Consistent evidence makes it easier to see whether the change improved movement, altered the silhouette or introduced a new compromise that needs discussion.
13. Make waistlines and seam placement part of the composition
A waist seam can define the silhouette, support a change in volume or provide a practical construction junction. It does not have to coincide with one universal visual rule. Decide whether the design calls for a natural, raised, lowered or less visibly defined waist. Show the intended line on a full garment sketch and explain how it relates to the customer's preferences and the overall proportion.
Seams can also guide the eye vertically or diagonally. If a design depends on an uninterrupted surface, ask how the required shaping will be handled. If seams are intended to be visible, specify their role rather than treating them as incidental. A panel line may need to align with a neckline, drape or skirt opening to look deliberate. These relationships should be checked before decoration makes the surface more complex.
During fitting, look for the seam's actual position on the body and compare it with the intended position. A seam that appears level on a flat sketch may not sit as expected in the sample. Ask the maker to assess balance and fit rather than correcting the issue through styling alone. Mark agreed changes on photographs or the sample so the revision can be traced clearly.
If the collection uses a repeated waist treatment, test how it works across different silhouettes. A detail that suits a full skirt may need adjustment on a column dress. Repetition should create recognition without forcing every garment into an unsuitable construction. Keep the shared design idea consistent while allowing the pattern and proportion to respond to the individual style.
14. Specify slits, vents and cut-outs with precision
Openings influence movement and coverage, so they need more information than an attractive reference photograph. For a slit, identify the location, intended height and the circumstances in which it should open. A front slit, side slit and back vent do not create the same visual effect. Describe whether the opening is mainly practical, mainly decorative or expected to perform both roles.
Review the opening in standing, walking and seated positions. The apparent height can change when the garment moves or when the skirt is placed under tension. Ask the wearer what level of exposure is comfortable and record that preference without judgement. If the sample exceeds it, consider the cut and construction rather than assuming the wearer can solve the problem through a more restricted way of moving.
Cut-outs also require a clear connection to the support and closure plan. Mark their shape and placement on a sketch, including the back view. Explain which edges should remain stable and whether any foundation layer is intended. Do not infer a construction method from a small online image; the visible opening may depend on elements that are not apparent in the photograph.
For product photography and customer information, show openings honestly. A single pose can make a slit appear more or less revealing than it is in normal use. Include a neutral view and useful detail images when presenting the finished style. Accurate presentation helps customers understand the design and reduces the gap between an editorial impression and the actual wearing experience.
15. Set length and train requirements early
Eveningwear length should be defined in relation to the intended footwear and event. Terms such as floor length or full length are useful starting points, but they do not replace an agreed measurement and fitting check. Ask whether the wearer wants the hem to clear the floor, lightly meet it or extend beyond it. Explain any difference between the front length and the back.
A train changes both the visual statement and the handling requirements. Describe its intended shape when arranged and when the wearer is moving. If the garment needs a way to manage the train later in the evening, discuss that during development. Do not assume that a suitable solution can always be added after the gown is complete without affecting the appearance or construction.
Bring the actual shoes to the relevant fitting whenever possible. If the shoes are not yet selected, agree on the basis for the provisional length and leave the final decision open. Record the footwear used for approval. This is a simple detail that helps explain later differences if the wearer changes to a substantially different shoe for the event.
Inspect the hem around the whole garment after the rest of the fit has been resolved. Changes at the bodice or waist can affect how the skirt hangs. Review the garment on the wearer in a relaxed stance and during a short walk. The aim is not merely a straight line in one photograph, but a length that supports the intended silhouette and the practical demands of the evening.
16. Place embellishment where it strengthens the silhouette
Embellishment is most effective when its placement has a clear relationship to the garment's structure. A concentrated shoulder detail, a gradual transition down a bodice or a defined border can direct attention with more clarity than an evenly crowded surface. Start with a placement drawing that identifies the focal area, the quieter areas and the intended density change between them.
Discuss the proposed materials and their appearance separately from their placement. Words such as crystal, pearl or metallic may refer to a visual direction rather than confirmed components. Request confirmation of the actual materials included in the quote. A photograph cannot establish composition, attachment method or the weight of the completed decoration. Those details matter to both the wearing experience and the final cost.
Test embellishment on a representative base, especially where the garment bends or meets the skin. Review how the decorated section drapes and whether it catches on adjacent layers or accessories. If the design includes a fitted area, check it in movement before expanding the treatment across the whole garment. A small approved motif does not necessarily prove that a densely covered bodice will behave as intended.
Keep the approval sequence clear: establish fit, approve the surface sample, confirm placement and then proceed with the agreed work. If a design change affects an already decorated area, discuss its practical and cost implications before proceeding. This protects the design process from a common problem in which beautiful finished handwork discourages a necessary fit correction.
17. Evaluate colour and surface under useful lighting
Eveningwear is often photographed in dramatic light, but development decisions need more consistent evidence. Review the selected colour and surface in clear, neutral conditions before judging editorial effects. A glossy material, a dark tone and reflective embellishment can change appearance across photographs. Treat images as supporting information and use physical approvals where practical for decisions that depend on precise colour or finish.
Describe the intended relationship between the outer fabric, lining and decoration. A tonal treatment may need components that work together without being identical, while a contrast design may require a very specific difference. Do not approve each element in isolation if the overall colour relationship is central to the style. Arrange the actual components together and record the selected combination.
For a collection, create a colour map showing which styles use each material or trim. This helps reveal whether the range feels coherent and whether one colour is carrying too many similar pieces. The map also makes substitutions easier to assess. A replacement that seems acceptable on one dress may interrupt a planned relationship across several garments.
When preparing final photographs, include images that communicate the product honestly as well as images that express the mood. Avoid excessive editing that changes the apparent colour, texture or coverage. Customers should be able to recognise the garment when they receive it. If a visual is an AI-generated concept, identify it as such and keep it separate from photographs intended to document an actual finished product.
18. Build a collection with distinct silhouette roles
A coherent eveningwear collection does not require every dress to share the same shape. It needs a clear relationship between the pieces and a reason for each one to exist. Begin with a small range map: a restrained option, a statement option, a movement-friendly option or another set of roles that reflects your customer. Choose roles based on demand and brand direction rather than on a fixed industry formula.
Compare the styles in simple outline drawings before considering all the surface details. If several pieces offer nearly the same neckline, waist and skirt combination, ask whether they are genuinely different products or only colour variations. Similarity can be intentional, but it should be recognised. A range becomes confusing when minor decoration changes are expected to perform the work of meaningful design differences.
Identify the elements that connect the collection. These might be a recurring fold direction, a controlled palette, a particular shoulder treatment or a shared approach to embellishment. Keep the connection strong enough to be recognisable and flexible enough to suit different garments. Forcing the same large detail onto every silhouette can weaken both the individual pieces and the overall range.
Use the development budget strategically. The most structurally unfamiliar style may need more exploration, while a simpler piece can establish material and finishing standards. Do not assume that a quiet design requires no sampling; clean surfaces can reveal fit and construction issues clearly. Decide which questions each sample is intended to answer and review the collection again once those answers are available.
19. Prepare a brief the maker can act on
A useful eveningwear brief combines visual direction with practical requirements. Include front and back references, a short occasion description, the desired silhouette, material preferences and the features that must be retained. If references come from different garments, annotate them individually. Explain that one image shows the neckline, another the skirt movement and another the colour direction. This avoids an impossible assumption that every visible detail must be combined.
List the current unknowns openly. You may not yet know the best fabric, the final construction or the appropriate amount of internal support. A brief can ask the development team to propose those solutions. What matters is distinguishing an open question from an approved decision. The maker should not have to guess whether a missing back view means freedom to design it or an expectation that it matches an unseen reference.
Include the intended quantity, size requirements, delivery destination and target event or launch date. These details affect the project discussion even before the garment is fully resolved. Do not treat the event date as a confirmed production promise. Ask what development, approval and production stages can realistically be accommodated and which decisions need to be made first.
Keep the brief concise enough to navigate while attaching detailed supporting material separately. A one-page summary can identify the current version, key priorities and open questions. Label reference files consistently and remove superseded instructions from the active set. Good organisation does not replace design skill, but it gives that skill a clearer problem to solve and reduces avoidable misunderstandings.
20. Choose a sampling sequence that answers the right questions
Sampling should investigate uncertainty in a deliberate order. If the main risk is proportion, an early shape trial may be more useful than a fully embellished sample. If the main issue is the behaviour of a particular fabric combination, a representative material trial may need to happen first. Discuss the purpose of each stage with the team instead of assuming that one finished-looking sample can resolve every question at once.
At the first review, separate structural decisions from finishing decisions. Check the outline, balance, coverage and movement before spending time on minor surface details. This does not make finishing unimportant; it prevents a polished detail from distracting from a fundamental issue. A beautifully finished hem is not a reason to approve a skirt that does not allow the wearer to walk as required.
Record the limitations of each sample. A trial in substitute fabric can show some aspects of fit while leaving drape or transparency unresolved. An undecorated bodice may not demonstrate the final weight or movement of the embellished version. Ask which approvals are final and which remain conditional. Clear limits make the sample useful without overstating what it proves.
After each revision, compare the new sample with the specific requested changes. Confirm whether the issue has been resolved and whether the revision altered another part of the garment. Keep a current approval record rather than accumulating disconnected messages. When the design reaches production readiness, the team should have one coherent description of the approved result, not a collection of partially conflicting comments.
21. Conduct a fitting that produces useful decisions
Prepare for the fitting by bringing the intended footwear and foundation garments, along with the current brief. Begin with a neutral standing view and let the garment settle naturally. Observe the front, back and sides before arranging folds or adding accessories. This establishes a clear baseline and makes it easier to distinguish a fit issue from an intentional styling effect.
Ask the wearer about comfort and security in specific situations. Instead of asking only whether the dress feels good, ask what happens when they sit, step forward, turn or reach. Encourage descriptions of location and sensation without making the wearer responsible for diagnosing the pattern. The maker can translate a report of pressure, slipping or restriction into possible technical causes.
Prioritise changes. A neckline that does not remain secure should be resolved before choosing between two decorative trim widths. Group comments into fit, silhouette, material and finish so the team can see how decisions relate. Mark each agreed revision clearly, including whether it is a required correction or an optional design preference still under consideration.
End the fitting with a shared summary. State what is approved, what will change and what requires another review. If photographs are used, label them with the sample version and date, with the wearer's permission. Do not rely on memory after a long discussion. A short, accurate record gives the next sample a clear purpose and helps prevent the same question from being reopened without new evidence.
22. Discuss budget through design priorities
An eveningwear quote depends on the actual project, including material, construction, embellishment, development and quantity. Do not apply a price from a different category to a gown without confirmation. When contacting LDX Stores, provide enough information for the team to understand the work and state your budget direction if you have one. This helps the discussion focus on feasible options rather than an undefined ideal.
Separate essential features from flexible ones. The silhouette or a particular neckline may be central, while the density of decoration or an additional accessory may be adjustable. If the proposed cost is above the target, discuss those priorities openly. A considered revision can preserve the identity of the design more effectively than reducing every element by the same arbitrary amount.
Ask what the quote includes. Sampling, revisions, final production, accessories, packaging and delivery may be treated differently depending on the project. Confirm these points in writing rather than assuming that a single number covers everything visible in a reference. If the scope changes, request an updated understanding before the additional work proceeds.
Evaluate value in relation to the intended use. A garment designed for repeated wear may justify choices that improve versatility and handling, while a one-off presentation piece may prioritise a specific visual impact. Neither approach removes the need for sound fit and honest product information. The aim is to spend deliberately on the qualities that matter to the customer, not to equate a higher number with a better design.
23. Build a timeline around decisions and delivery
Start with the date the garment needs to be ready for use, then discuss the stages required before that point. Design clarification, material confirmation, sampling, revisions, production and delivery are distinct activities. Ask LDX Stores to confirm the schedule for your eveningwear project. A production estimate for another category does not establish the timing for a gown with different development needs.
Identify approvals that depend on the customer. A material decision, fitting response or confirmation of final details can affect what the team is able to do next. Agree how feedback will be supplied and who has authority to approve it. For a brand with several reviewers, collect comments into one coherent response so the maker does not receive competing instructions from different people.
Discuss delivery separately from making the garment. The destination, chosen service and any relevant handling requirements should be considered in the project plan. Do not treat dispatch as the same event as arrival. If the garment is for a fixed occasion, explain that clearly and ask what contingency is realistic rather than assuming that every stage will occur without adjustment.
When a change is requested late, assess its effect before agreeing to it. A small visual alteration can involve substantial work if it affects an already resolved construction or decorated area. Ask whether the revision changes the cost or schedule and record the answer. A clear decision at this stage is more useful than accepting a change informally and discovering its consequences near the event.
24. Approve the complete garment, including the details
Final approval should refer to a complete, identifiable version of the garment. Confirm the silhouette, material, colour, lining, closure, decoration, length and any included accessories. If a detail remains unresolved, state it explicitly rather than calling the whole piece approved. The final record should allow both customer and maker to understand what is expected without reconstructing the entire conversation.
Inspect visible finishes in appropriate light and review the garment's functional areas. Check that the intended fastening can be used as agreed, that loose decorative elements are handled appropriately and that the wearer understands any assistance required. For a repeat order, discuss what the approved sample establishes and what quality checks will be used for the production pieces.
Review presentation as well as construction. A product description should identify the actual garment and avoid including styling items that are not supplied. Photographs should show useful angles, including the back and significant details. If the website includes concept imagery, keep that distinction clear so customers do not mistake a development illustration for evidence of the finished product.
Keep the final approval record accessible with the garment reference and project files. For future reorders or related styles, it provides a reliable starting point. It does not mean every later version will be identical if materials or requirements change; those changes still need confirmation. A well-documented approval simply makes the baseline clear and reduces unnecessary ambiguity.
25. Plan care, storage and repeat wear from the actual construction
Care advice should follow the confirmed materials and construction of the finished garment. Do not infer a cleaning method solely from a generic fabric name or from the appearance of an online image. Ask for the relevant care information when the project is finalised, especially when the garment combines delicate surfaces, internal support and embellishment. Different components may create different handling requirements.
Discuss storage and transport in practical terms. A heavily structured or decorated garment may need a different approach from a simple fluid dress. Ask how it should be supported and packed, and whether any components require particular attention. Avoid applying heat, moisture or a cleaning product based on a general internet tip when the actual materials have not been confirmed.
For customers planning repeat wear, consider styling flexibility during design. A clear silhouette, a manageable length or an agreed removable element may make the garment useful for more than one occasion. Any removable feature should be developed and tested as part of the design, not assumed to work because it appears detachable in a reference image.
After wear, note any practical observations that could inform a future order. Perhaps a closure was difficult to reach, a train required more help than expected or a sleeve worked particularly well. This feedback is valuable when it describes actual use rather than assigning blame. It can guide a more personal, effective brief for the next garment and strengthen the relationship between design intention and lived experience.
26. A fictional eveningwear brief you can adapt
The following example is fictional and illustrates how to communicate a project. A client wants a black evening gown for a formal dinner followed by a reception. The main priorities are a clean asymmetric neckline, comfortable seated wear and a skirt that allows independent walking. The client likes a fluid surface but has not selected a fabric. The reference images show the shoulder direction and mood only; their materials are not assumed to be confirmed.
The proposed silhouette is close through the bodice with a controlled release below the hip. A side opening may be considered if needed, but the client wants its coverage reviewed during fitting. The back should feel connected to the front diagonal rather than introducing a separate decorative idea. The garment will be worn with a particular pair of shoes, which will be available for the length check. No jewellery or bag is included in the garment request.
The client asks the team to propose a suitable material and support approach, then explain the sampling stages. The first review should focus on neckline stability, waist comfort, walking and seated coverage. Surface decoration is intentionally limited so the drape remains the focal point. If the quote exceeds the budget direction, the client would prefer to simplify secondary details before changing the main silhouette.
The enquiry includes the event date, destination, measurement questions and the selected reference files. It asks for confirmation of price, development timing, production timing and delivery arrangements. This brief does not resolve every technical decision, but it gives the maker a clear intention and a useful set of tests. You can adapt the structure while replacing every preference with the requirements of your own project.
27. Frequently asked questions about eveningwear silhouettes
Which silhouette is best for my body?
There is no single required silhouette for a body type. Begin with your preferences, the occasion and the way you want to move. A fitting can help compare proportion and comfort without relying on rigid rules. Explain what you enjoy wearing and which features matter to you, then develop the shape around those priorities.
Can a reference photograph be reproduced exactly?
A reference can communicate direction, but a photograph does not reveal every construction detail or material. Discuss an original interpretation and identify the features you want to achieve. The final result depends on the agreed design, actual fabric, measurements and development process. Do not assume that an unseen back or internal structure is already specified by the image.
Should I choose the fabric before the silhouette?
The two decisions should develop together. You can begin with a shape or with a material you love, but test whether they support each other before final approval. A representative sample is especially helpful for drape, structure and decorated areas. Record any differences between trial material and the proposed final material.
How much will a custom evening gown cost?
Request a project-specific quote from LDX Stores. Include the design direction, quantity, material preferences, decoration and intended timing. Prices confirmed for dancewear or another category should not be treated as an eveningwear quotation. Ask what development, production and delivery items are included so you can compare the proposal accurately.
28. Turn your silhouette choice into a project enquiry
Before sending your enquiry, review whether the brief explains the complete wearing experience. It should identify the occasion, customer, silhouette, important coverage preferences and required movement. Include front and back references with annotations, the intended footwear basis and any material questions. You do not need to solve the pattern yourself; you do need to make your priorities understandable.
Check that every reference has a purpose. Remove images that introduce conflicting directions without explanation, and mark any detail that is only inspirational. Add a short list of essential features and flexible features. This gives the development team a practical way to propose alternatives while preserving the identity of the garment. It also makes a budget discussion more productive.
When your information is ready, use the project enquiry form to share the brief and request confirmation of the next steps. Ask for a project-specific material, price and schedule discussion. A successful eveningwear silhouette is the result of connected decisions: the customer's intention, the pattern, the fabric, the fitting and the way the garment will actually be worn. A clear brief makes those decisions easier to develop together.
What should I send with my enquiry?
Send clear references, measurements, estimated quantities and your target date. Mark which details are essential and which can be discussed. LDX Stores develops garments in Sialkot, Pakistan, for designers and brands, with final specifications agreed for each project.
Start with one essential design feature, a clear scope and a written quote. LDX has selected starting options under US$100; complex designs are quoted individually.
Use a flexible tape, consistent units and the measurement list agreed for your design. Record body measurements separately from finished-garment dimensions and shoe height.
Custom design changes the garment brief; made-to-measure adapts fit; alterations modify an existing garment. Tell LDX which result you need so the project can be scoped correctly.
Choose fabric by the silhouette and wearing conditions, then review lining, opacity and colour together. A material name or photograph alone does not define the final garment.
LDX STORES / PHOTOGRAPHED DETAILS
Explore the original photographs
Study the silhouettes, finishes and details in photographs supplied by LDX Stores. Contact us to confirm the materials, sizing, availability and price for your project.